
In This Article
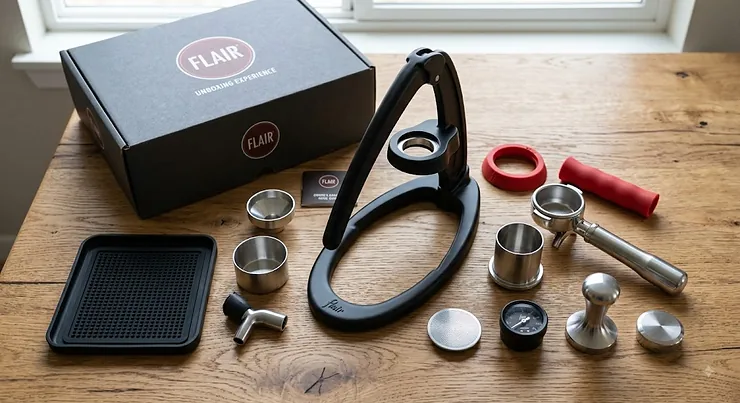
Somewhere between a moka pot and a $3,000 dual-boiler machine sits a strange little category of gear that convinces otherwise reasonable people to hand-pump their morning coffee: the flair espresso maker. No pump, no boiler, no plug — just a lever, your own arm, and a surprising amount of control over one of the fussiest drinks on earth. If you’ve spent any time in coffee forums, you already know the name Flair gets thrown around constantly, usually followed by an argument about whether it’s genuinely a “prosumer” tool or just a clever workout with crema at the end.
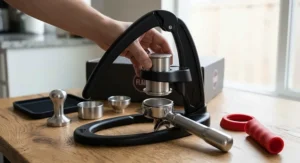
Here’s the short answer: it’s both, depending on which model you buy and how seriously you take the ritual. A flair espresso maker uses direct hand pressure through a lever arm to force hot water through finely ground coffee, generating the same 6-9 bar range that professional machines chase electronically. That’s the whole trick — and it’s also why these devices punch so far above their price tag.
This guide breaks down seven real, currently available manual espresso presses — five from Flair’s own lineup, plus two well-known rivals — with honest analysis pulled from real specs and aggregated owner feedback, not marketing copy. We’ll cover setup, common mistakes, whether the investment is actually worth it, and how Flair stacks up against ROK and other portable competitors. No fabricated taste tests, no invented five-star reviews — just the research, laid out straight.
Quick Comparison Table
| Product | Type | Price Range | Best For |
|---|---|---|---|
| Flair NEO Flex | Lever, plastic frame | $100-$130 range | First-time buyers on a tight budget |
| Flair Classic | Lever, metal frame | $160-$190 range | Portable daily use, no electronics |
| ROK Espresso GC | Dual-handle press | $150-$200 range | Buyers who dislike single-lever fatigue |
| Wacaco Picopresso | Piston, ultra-compact | $120-$160 range | Hikers, campers, carry-on travel |
| Flair Signature | Lever, deep basket | $230-$270 range | Cold-press espresso and daily brewing |
| Flair Pro 2 | Lever, stainless brew path | $320-$360 range | Enthusiasts who want gauge-based profiling |
| Flair 58 | Lever, 58mm commercial standard | $630-$750 range | Dedicated home baristas replicating café shots |
Looking at this table, the split is pretty clean: anything under $200 is a “learn the ropes” purchase, the $230-$360 range is where Flair’s real personality shows up (pressure gauges, better baskets, all-metal brew paths), and the Flair 58 is a different animal entirely — a 58mm commercial-format portafilter squeezed into a countertop lever press. Budget buyers shouldn’t feel bad starting with the Flair NEO Flex or ROK Espresso GC; both can produce genuinely good shots once dialed in, they just ask more patience of you than the pricier models do.
💬 Already leaning toward a favorite? Scroll down to see exactly how it stacks up against the competition.
What Is Manual Espresso Extraction?
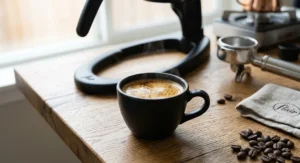
Manual espresso extraction is the process of forcing hot water through compacted, finely ground coffee using hand-applied pressure instead of an electric pump. A lever, piston, or press mechanism generates roughly 6-9 bar of pressure — the same range professional espresso machines target — pulling a concentrated shot topped with crema in about 25-40 seconds.
The appeal is control. On an automatic machine, the pump decides the pressure curve for you. On a flair espresso maker, your hand is the pump, which means you can ramp pressure up slowly, hold it steady, or taper off at the end — a technique baristas call pressure profiling. It’s more work, but it’s also the reason lever devices have a cult following among people who treat espresso as a hobby rather than a caffeine delivery system.
Top 7 Flair Espresso Makers: Expert Analysis
Below are seven real, currently sold manual espresso presses spanning entry-level to flagship. Each has been evaluated against its published specs and the aggregated sentiment found in verified owner and reviewer feedback — never invented ratings or fabricated quotes.
1. Flair NEO Flex — cheapest real lever with a pressure gauge
The standout here is what’s missing from cheaper alternatives: a genuine pressure gauge, included even at this entry price. That single feature changes the learning curve dramatically, because you’re no longer guessing whether you’re under- or over-extracting — you can watch it happen. The NEO Flex ships with two portafilters, a forgiving pressurized “Flow Control” basket for beginners and a bottomless 2-in-1 basket for once you’ve got a grinder that can go fine enough. Its thin-walled brew cylinder is marketed as needing less preheat ritual than older Flair models, though owner reports in coffee forums suggest the jury’s still out on skipping preheat entirely — most still recommend a quick hot-water rinse first.
Based on the spec sheet, this is squarely a beginner’s machine: a lightweight plastic stand keeps costs down but also means it doesn’t feel as “permanent” on a counter as the metal-bodied models. That’s a fair trade for the price. Reviewers consistently note that the NEO Flex punches well above its cost bracket for anyone willing to dial in dose and grind — Flair’s own owner community reports success with doses as low as 9 grams despite the printed 12-18 gram recommendation.
Pros:
- ✅ Pressure gauge included at an entry-level price
- ✅ Two portafilter styles cover beginner and advanced use
- ✅ Fully portable with no electronics to worry about
Cons:
- ❌ Plastic frame feels less sturdy than metal Flair models
- ❌ Preheat behavior still debated among owners
At around $100-$130, the NEO Flex is the lowest financial risk in the Flair lineup, and it’s a smart way to find out if hand-pumped espresso is a ritual you’ll actually stick with.
2. Flair Classic — the original, no-frills manual gateway
What stands out about the Classic is that it’s essentially the machine that started the modern manual-espresso movement, still sold with the same core mechanism years later. It ships with both a pressurized basket for forgiving first shots and a non-pressurized “pro” basket for once you’re ready to graduate to real extraction technique. Unlike the NEO Flex, the base Classic skips the pressure gauge, which keeps costs down but removes the real-time feedback that makes dialing in easier.
Here’s what the spec sheet doesn’t spell out: because there’s no gauge, you’re extracting by feel and by timing your shot, which is exactly how baristas did it for decades before gauges became common. What most buyers overlook about the Classic is that its lack of electronics isn’t a downside so much as its entire design philosophy — nothing to charge, nothing to break, and a full teardown-and-clean in under two minutes. Aggregated owner sentiment frames the Classic as a “budget gateway” into serious manual espresso, with the caveat that the trade-offs (hand-pumping, hot-water preheating, no milk steaming) are inherent to the format rather than flaws specific to this model.
Pros:
- ✅ Proven, long-running design with a large support community
- ✅ Includes both pressurized and pro baskets
- ✅ Compact enough to travel in a backpack
Cons:
- ❌ No pressure gauge on the base configuration
- ❌ Requires manual hot-water preheating before every shot
Priced in the $160-$190 range, the Classic sits as Flair’s true budget-to-mid bridge — a step up from the NEO Flex in build quality without yet reaching gauge-equipped territory.
3. ROK Espresso GC — the dual-handle alternative to a single lever
What sets the ROK apart immediately is its mechanism: instead of one central lever like every Flair model, it uses two handles you press down simultaneously, distributing effort across both arms rather than one. That changes the physical experience of pulling a shot noticeably — some owners find it easier on the wrists, since you’re not relying on a single point of leverage. The ROK ships as a single, all-in-one unit rather than a stack of separable parts, which shows up in its bulkier, oval-tin storage footprint compared to Flair’s more modular, take-apart design.
On paper, this means the ROK trades some portability for ergonomic comfort. It doesn’t include a pressure gauge at any tier, which puts it at a real disadvantage against gauge-equipped Flair models for anyone trying to learn extraction science rather than just brew by feel. Reviewers who’ve compared both machines directly tend to favor Flair on packability and precision, while acknowledging the ROK’s two-handle press feels more intuitive to first-time users who’ve never operated a lever espresso device before.
Pros:
- ✅ Two-handle press distributes effort more evenly
- ✅ All-in-one unit with fewer parts to lose
- ✅ Competitive pricing against comparable Flair tiers
Cons:
- ❌ No pressure gauge available at any tier
- ❌ Bulkier and harder to pack than Flair’s modular design
Typically priced in the $150-$200 range, the ROK Espresso GC is worth considering specifically if the idea of a single-lever workout doesn’t appeal to you — see our full breakdown in the vs ROK section below.
4. Wacaco Picopresso — the pocket-sized travel specialist
The Picopresso’s standout feature is sheer size: this is the only device on this list that genuinely disappears into a jacket pocket or a daypack side compartment. Instead of a lever, it uses a horizontal hand-pump piston to build pressure, which is a fundamentally different mechanism from every Flair model and the ROK. It includes a bottomless portafilter and a built-in tamper, and Wacaco advertises pressure capability up to 18 bar, though most reviewers note real-world brewing tends to land closer to the same 6-9 bar sweet spot as everything else on this list — more advertised headroom doesn’t mean you should actually brew there.
Here’s what the spec sheet won’t tell you: the tiny water reservoir means you’re really only pulling a single concentrated shot per fill, and the compact size that makes it so travel-friendly also makes it more physically awkward to pump than a full-length lever. Reviewers who’ve tested it alongside larger devices consistently describe it as “highly competent for its size,” with most agreeing it’s the strongest pick specifically for hikers, campers, and carry-on travelers rather than a daily kitchen-counter machine.
Pros:
- ✅ Smallest, most travel-friendly design in this roundup
- ✅ Bottomless portafilter with an included tamper
- ✅ No lever arm needed to store or transport
Cons:
- ❌ Small reservoir limits it to single shots per fill
- ❌ Piston pumping can feel awkward compared to lever leverage
At roughly $120-$160, the Picopresso earns its keep almost entirely on portability — see the dedicated travel comparison further down this article.
5. Flair Signature — the mid-tier daily driver with a cold-brew trick
What genuinely sets the Signature apart is its basket geometry: deeper and narrower than the Classic’s, which means less surface area to pressurize and, as a side effect, more tolerance for a slightly coarser grind. Based on the spec comparison, that’s a meaningful advantage for anyone using an entry-level grinder that struggles to hit espresso-fine consistently — the Signature is more forgiving than machines demanding a razor-fine grind. It also supports cold-pressed espresso (brewing with cold rather than boiling water), a genuinely unusual feature not commonly found on machines twice its price.
Owners consistently report that the narrower basket requires noticeably less arm strength to build full pressure than the Classic’s standard basket, which matters more than it sounds like for anyone brewing daily. The trade-off is that the Signature still tops out around the same 12-18 gram dose range as the Classic, so if you’re chasing bigger, more diluted “lungo”-style shots, you’ll want to look higher in the lineup.
Pros:
- ✅ Narrower basket requires less physical effort to pressurize
- ✅ Supports cold-pressed espresso brewing
- ✅ More forgiving of coarser, less-precise grinds
Cons:
- ❌ Dose capacity still capped in the 12-18 gram range
- ❌ Sits in a pricing gap between budget and gauge-heavy premium models
Priced around $230-$270, the Signature is the pick for someone who’s confirmed they’ll actually use a manual machine daily and wants a genuinely easier pull than the entry-level Classic.
6. Flair Pro 2 — the portable pressure-profiling specialist
The Pro 2’s headline feature is its integrated pressure gauge paired with an all-stainless-steel bottomless portafilter and brew post — a combination that lets you watch and shape your pressure curve in real time, something the Classic, Signature, and ROK simply can’t do. Its cast-aluminum base keeps total weight manageable for travel while still feeling substantially more premium than the plastic-framed NEO Flex. A removable stainless spout and a silicone-wrapped gauge for durability round out the design refinements over the original Pro.
What most buyers overlook about the Pro 2 is that it’s positioned as the most affordable entry point into genuine pressure profiling — the technique of deliberately varying pressure throughout a shot rather than holding one constant number. Reviewers who’ve spent extended time with it describe the espresso quality as rivaling automatic machines costing roughly double, which lines up with its reputation as the “serious hobbyist’s” pick before stepping up to the full 58mm-format Flair 58. Owner feedback flags one consistent limitation: it still requires a genuinely capable burr grinder to perform, so factor that into your total budget.
Pros:
- ✅ Integrated pressure gauge for real profiling control
- ✅ All-stainless brew path improves durability and cleanability
- ✅ Genuinely portable despite premium feature set
Cons:
- ❌ Requires a high-quality espresso-capable grinder to shine
- ❌ Priced well above entry-level Flair models
Typically listed in the $320-$360 range (watch for bundle pricing that pushes higher), the Pro 2 is arguably the best value-to-capability ratio in Flair’s entire catalog.
7. Flair 58 — the flagship with a true 58mm commercial portafilter
The Flair 58 stands alone on this list for one reason: it’s the first manual lever machine in Flair’s history to use the industry-standard 58mm portafilter found on professional café equipment, rather than Flair’s smaller proprietary basket sizes. Paired with that is a preheat temperature controller offering three settings tuned for light, medium, and dark roasts, maintaining thermal consistency through the shot without needing to submerge anything in hot water first. At roughly 7.5 pounds with a stainless-steel-and-aluminum build, it’s noticeably heftier and more “permanent” feeling than every other machine here.
Based on the spec comparison, this positions the 58 less as a travel device and more as a genuine countertop centerpiece — something you commit to rather than something you pack away between shots. The removable brew head simplifies cleaning despite the added complexity of the temperature controller, and its 6-9 bar user-controlled pressure range with an 18-22 gram dose capacity puts it in line with what a small commercial machine can pull. Reviewers who’ve spent real time with it describe a genuine learning curve, but one they consider “part of the fun” rather than a flaw — and note that compared to prosumer electric machines costing several times more, the price is defensible given the build quality and 58mm compatibility with commercial baskets and tampers.
Pros:
- ✅ True 58mm portafilter compatible with commercial accessories
- ✅ Three-setting preheat controller for consistent thermal management
- ✅ Removable brew head simplifies deep cleaning
Cons:
- ❌ Heaviest and least travel-friendly machine in this roundup
- ❌ Steepest price and learning curve of any Flair model
At around $630-$750 depending on configuration, the Flair 58 is squarely for the dedicated enthusiast — everyone else will likely be better served (and better budgeted) by the Flair Pro 2 or Flair Signature.
Top 7 Products: Full Spec Comparison
| Product | Portafilter | Pressure Gauge | Dose Range | Price Range |
|---|---|---|---|---|
| Flair NEO Flex | Proprietary, dual basket | Yes | 9-18g | $100-$130 |
| Flair Classic | Proprietary, dual basket | No (base model) | 12-18g | $160-$190 |
| ROK Espresso GC | Proprietary | No | ~14-18g | $150-$200 |
| Wacaco Picopresso | Proprietary, bottomless | No | ~9g | $120-$160 |
| Flair Signature | Proprietary, deep/narrow | Optional bundle | 12-18g | $230-$270 |
| Flair Pro 2 | Proprietary, stainless | Yes | 16-20g | $320-$360 |
| Flair 58 | 58mm commercial standard | Yes (via 58x/Plus) | 18-22g | $630-$750 |
This table makes the real dividing line obvious: pressure gauges and dose capacity climb together as price increases, which tracks with how much control you’re actually buying. The jump from the Flair Signature to the Flair Pro 2 is really a jump from “good manual espresso” to “profiling-capable manual espresso,” while the leap to the Flair 58 is about portafilter standardization more than raw capability — you’re buying compatibility with commercial-grade baskets and tampers, not just a bigger number on the spec sheet.
Flair Espresso Brewing Guide: Setup, First Shots & Maintenance
Getting a good first shot out of any flair espresso maker comes down to three variables you actually control: dose, grind, and preheat. Start by weighing your dose on a gram scale rather than eyeballing it — most models recommend 12-18 grams, though narrower baskets like the Signature’s can work well closer to 9-14 grams. Grind should be roughly as fine as you’d use on an automatic espresso machine; if the shot pulls in under 15 seconds, go finer, and if it’s still dripping past 45 seconds, coarsen up.
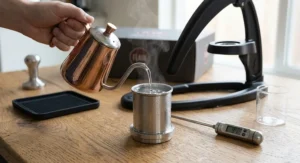
Preheating matters more than most first-time buyers expect. On non-electric models like the Classic or Signature, pour boiling water through the empty brew cylinder and let it sit for 20-30 seconds before dumping it and loading your dose — skipping this step is the single most common reason first shots taste thin and sour. For maintenance, disassemble the brew head after every session and rinse with hot water; a monthly deep clean with a dedicated espresso machine cleaner (never dish soap, which can leave residue in silicone seals) keeps flow rates consistent. Replace rubber gaskets roughly once a year with normal daily use — they’re inexpensive and the most common wear item across the entire manual-lever category.
✨ Ready to build your setup? A capable burr grinder makes or breaks every machine on this list — pair yours with a compatible model above to skip the trial-and-error phase.
Real-World Scenarios: Who Should Buy Which Flair
If you’re a college student living in a dorm with no room for a full setup, the Flair NEO Flex or Wacaco Picopresso make the most sense — both pack small, need no outlet, and forgive imperfect technique while you’re still learning. If you’re a remote worker who drinks two or three espresso-based drinks daily and has already invested in a decent grinder, the Flair Pro 2 offers the best return: enough gauge-based control to genuinely improve your shots without the bulk or price ceiling of the flagship.
If you’re an experienced home barista coming from a semi-automatic machine and want the tactile, hands-on challenge without giving up commercial-standard hardware, the Flair 58 is built for exactly that transition — its 58mm portafilter means your existing bottomless portafilters and tampers likely already fit. And if you travel constantly for work and want café-quality espresso in hotel rooms or Airbnb kitchens, the Picopresso’s pocket-sized footprint beats every lever option here purely on packability, even if the shots require slightly more elbow grease per cup.
Problem → Solution: Common Flair Espresso Mistakes Fixed
Problem: Shots taste sour or weak. This is almost always underextraction from a grind that’s too coarse or a dose that’s too light. Solution: grind finer in small increments and confirm your dose on a scale rather than a scoop.
Problem: Lever feels impossible to push down. This usually means the grind is too fine or the dose is packed too tightly. Solution: back off the grind slightly and tamp with consistent, moderate pressure rather than maximum force.
Problem: Espresso comes out bitter or harsh. Overextraction is the usual culprit, often from water that’s too hot or a shot pulled too slowly. Solution: on models with a preheat controller like the Flair 58, drop to the medium or light-roast setting; on non-electric models, let boiling water cool for 15-20 seconds before preheating.
Problem: No crema forming on top. Stale beans are the most common cause, followed by insufficient pressure. Solution: use beans roasted within the past 2-4 weeks and confirm you’re hitting at least 6 bar on gauge-equipped models.
Problem: Portafilter leaks around the edges. This typically points to a worn gasket or an overfilled basket. Solution: check the rubber seal for wear and never exceed the machine’s stated maximum dose.

How to Choose a Flair Espresso Maker
- Decide your budget ceiling first. Manual espresso makers range from around $100 to $750, and going in with a number keeps you from overspending on gauge features you may not use.
- Check your grinder before anything else. If your current grinder can’t produce a consistent fine, espresso-ready grind, even the Flair 58 will disappoint you — budget for grinder upgrades as part of the total cost.
- Weigh portability against your lifestyle. Frequent travelers should lean toward the Picopresso or NEO Flex; kitchen-counter loyalists can justify the bulkier Pro 2 or 58.
- Decide if you need a pressure gauge. Beginners often assume they don’t need one, but reviewers consistently note it shortens the learning curve dramatically.
- Factor in dose capacity for your drink of choice. Larger dose ranges (Pro 2, 58) suit bigger shots and lungo-style drinks better than baskets capped near 12-14 grams.
- Consider maintenance tolerance. All-stainless brew paths (Pro 2, 58) resist wear better long-term than models with more plastic componentry.
- Read aggregated owner sentiment, not just marketing pages. Forums like Home-Barista and dedicated review sites reveal real long-term reliability patterns manufacturers won’t advertise.
Flair Espresso Maker vs ROK: Which Manual Press Wins?
This comparison comes up constantly because both machines occupy similar price territory while using completely different mechanisms. Flair’s single-lever design concentrates your effort through one arm and a long handle, giving you finer control over pressure ramp and timing — genuinely useful once you’re trying to replicate specific pressure profiles. The ROK’s dual-handle press spreads effort across both arms, which many first-time users find physically easier, even if it sacrifices the precision that comes from single-point leverage.
| Feature | Flair (Classic/Signature) | ROK Espresso GC |
|---|---|---|
| Mechanism | Single lever | Dual handle press |
| Pressure Gauge | Available on select models | Not available |
| Portability | Modular, disassembles fully | Bulkier, one-piece unit |
| Best For | Precision-focused brewers | Beginners wanting less strain |
The data above suggests the decision really comes down to what kind of manual brewer you want to become. If you plan to chase pressure profiling and eventually upgrade toward the Pro 2 or 58, Flair’s ecosystem and gauge availability give you a clearer growth path. If you just want a simpler, less fussy way to hand-pull espresso without ever thinking about profiling, the ROK’s two-handed press removes some of the physical intimidation factor that turns off first-time lever users.
Portable Espresso Press: Flair vs Wacaco for Travel
When portability is the deciding factor, the comparison shifts from “which brews better” to “which fits in your bag.” The Picopresso’s compact, piston-driven design genuinely disappears into a daypack in a way no Flair model can match — even the disassembled Classic still takes up noticeably more volume once you account for its lever arm and stand. What the spec sheet won’t tell you is that this size trade-off comes with a real ergonomic cost: pumping a small horizontal piston repeatedly is a different kind of workout than pulling a long lever, and several reviewers note it takes more total effort per shot despite the smaller footprint.
Independent testing from outlets like CNN Underscored has echoed this trade-off, noting that budget lever presses trade some convenience for genuinely better pressure control than piston-driven alternatives. Flair’s answer to portability is the NEO Flex and Classic, both of which fully disassemble into a case roughly the size of a large water bottle. They’re not pocket-sized, but they retain the lever mechanism’s mechanical advantage, meaning less physical strain per shot than a piston press. If your travel style is backpacking or minimalist carry-on, the Picopresso wins outright. If you’re checking a bag or driving and just want the smallest lever-based option, the Flair NEO Flex remains the better-balanced portable espresso press for most people.
📦 Packing for a trip? Compare the compact options above side-by-side before you commit to a travel setup.
Is Flair Espresso Worth It? Long-Term Cost & Value
Here’s the honest math: a decent semi-automatic electric espresso machine capable of similar shot quality typically starts around $350-$500 and climbs well past $1,000 for anything with real temperature stability. A flair espresso maker gets you into that same quality tier — genuine 9-bar extraction with real crema — for as little as $100-$200 with the NEO Flex or Classic, or $320-$750 if you want the profiling and 58mm compatibility of the Pro 2 or 58.
The catch is total cost of ownership isn’t just the machine. You’ll need a burr grinder capable of a consistent fine grind (budget at least $150-$200 for something adequate), and replacement gaskets every year or two add a small recurring cost. Even accounting for that, the electricity-free operation and multi-year gasket life mean the long-term running cost stays lower than most automatic machines, which eventually need descaling solutions, pump replacements, or boiler repairs. Based on the spec comparison and aggregated owner longevity reports, most Flair models remain functional well past the five-year mark with basic gasket maintenance — a genuinely strong ROI for anyone who’ll actually use the machine regularly rather than let it sit on a shelf.
Benefits vs Traditional Automatic Machines
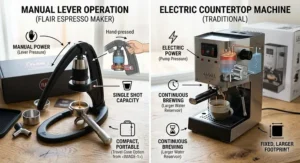
| Factor | Manual (Flair-style) | Traditional Automatic |
|---|---|---|
| Upfront Cost | Lower to mid-range | Mid to very high |
| Electricity Needed | No (except 58/58x preheat) | Yes, always |
| Maintenance | Simple gasket replacement | Descaling, pump/boiler repairs |
| Learning Curve | Steeper, hands-on | Gentler, more automated |
Put simply, manual machines shift cost from the price tag to your own time and technique — a trade plenty of enthusiasts consider worth making, and one that would be a mistake for anyone who just wants to press a button before their commute.
What to Expect: Real-World Performance of Flair Espresso Makers
Specs on a page don’t tell you what pulling a shot actually feels like, so here’s the practical translation. Building to the standard 9-bar pressure range by hand takes real, sustained arm effort for roughly 25-40 seconds — noticeably more physical than pressing a button, though far less than most first-timers expect once dose and grind are dialed in correctly. Gauge-equipped models like the Pro 2 and 58 turn this from guesswork into something closer to a controlled experiment, letting you watch pressure build in real time and adjust your push accordingly.
Crema production tends to be genuinely excellent across the whole lineup when grind and dose are correct — several reviewers specifically call out Flair’s crema quality as comparable to, or better than, entry-level automatic machines. Where manual machines fall short of automatics is consistency between shots when you’re new to the format; your third shot of the morning may pull differently than your first simply because your arm effort varies. That inconsistency shrinks dramatically with practice, which is really the entire promise of manual espresso: more work upfront, more control and skill over time.
Common Mistakes When Buying a Manual Espresso Maker
The most frequent mistake is buying the machine without budgeting for a proper grinder — a $600 Flair 58 paired with a blade grinder or a cheap hand grinder will consistently underperform a $150 setup with a quality burr grinder. Another common pitfall is assuming a higher price always means an easier learning curve; in reality, the Flair 58‘s temperature controller adds a genuine extra step to the ritual rather than simplifying it. Buyers also frequently underestimate portability needs, picking a bulkier model and then never actually traveling with it, or the reverse — buying an ultra-compact piston press like the Picopresso for daily home use when a lever machine would’ve been physically easier on the wrist long-term.
Finally, don’t skip reading aggregated real owner sentiment before buying. Manufacturer pages naturally emphasize strengths and downplay friction points like preheat rituals or basket size limitations — genuine owner communities are far more candid about what daily use actually feels like months in.
Features That Actually Matter (And Those That Don’t)
What actually matters: a pressure gauge (dramatically shortens the learning curve), an all-stainless brew path (better long-term durability and easier cleaning), and dose capacity matched to your typical drink size. What matters less than marketing suggests: maximum advertised pressure ratings — Wacaco’s 18-bar claim on the Picopresso sounds impressive, but every reviewer agrees you should still be brewing in the same 6-9 bar range regardless of a machine’s ceiling. Similarly, color options and cosmetic finishes (matte black, brushed chrome, copper accents) genuinely don’t affect shot quality, despite often carrying a price premium.
Frequently Asked Questions
❓ Is a flair espresso maker worth it compared to an automatic machine?
❓ Is the Flair 58 review consensus positive?
❓ Is the Flair Pro 2 review verdict better than the Signature?
❓ Does a flair espresso maker need electricity?
❓ How is manual espresso extraction different from a Moka pot?
Conclusion
Choosing the right flair espresso maker really comes down to being honest about how you’ll actually use it. If you’re testing the waters, the Flair NEO Flex or ROK Espresso GC let you find out cheaply whether hand-pumped coffee is a ritual you’ll keep up with. If you already know you love the process and want gauge-based control, the Flair Pro 2 offers the best balance of capability and price in this entire roundup. And if you’re a dedicated enthusiast chasing commercial-grade compatibility, the Flair 58 delivers a genuinely different tier of hardware — at a genuinely different price.
Whichever tier you land on, the underlying appeal stays the same: real espresso, real crema, and real control, without a single watt of electricity required for most of the lineup. That’s a rare combination in home coffee gear, and it’s exactly why this category keeps growing every year.
Recommended for You
- Direct Lever Espresso Machine: 7 Best Picks Worth Buying in 2026
- Elektra Microcasa Leva: 7 Best Italian Lever Machines (2026)
- La Pavoni Europiccola Review 2026: 7 Iconic Lever Machines Compared
Disclaimer: This article contains affiliate links. As an Amazon Associate, I earn from qualifying purchases. If you purchase products through these links, we may earn a small commission at no additional cost to you.
✨ Found this helpful? Share it with your friends! 💬🤗
