In This Article
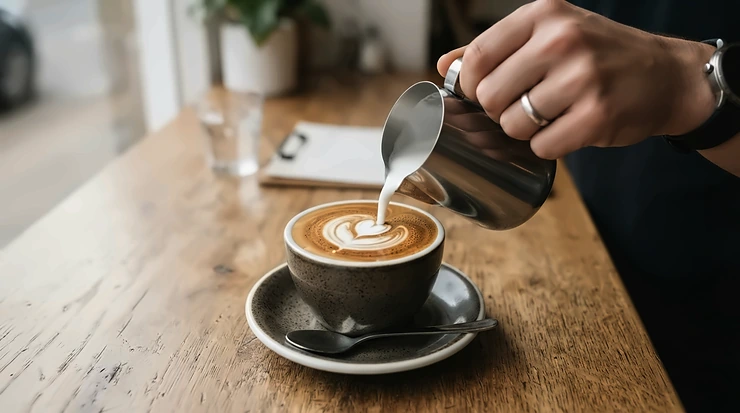
Here’s the thing nobody tells you before your first espresso machine purchase: most of the disappointment doesn’t come from bad beans or a cheap grinder. It comes from temperature swings you can’t see, can’t predict, and definitely can’t blame on yourself. That’s exactly the problem a PID espresso machine for beginners is built to solve — it takes the invisible, wildly inconsistent heat-up-and-cool-down cycle of a basic thermostat and replaces it with digital precision that holds steady within a degree or two of your target. Reviewers and appliance testers converge on the same idea: PID temperature controllers use algorithms to predict and correct temperature fluctuations in real time, keeping water temperature within about one degree of the target throughout extraction, which matters enormously for anyone who hasn’t yet developed the palate to compensate for a sour or bitter shot.
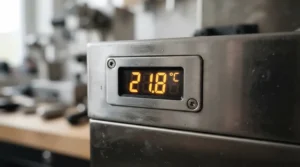
If you’re shopping for your first espresso machine right now, you’ve probably noticed the same acronym popping up on every promising listing: PID. It’s not marketing fluff. It’s the control system, based on the same engineering principle used in cruise control and industrial process automation (more on that below), that keeps your water from swinging five or ten degrees in either direction mid-shot. For a beginner, that stability is the difference between “why does my espresso taste burnt” and “huh, that’s actually good.”
This guide breaks down seven real, currently available machines across every budget tier, explains exactly what their PID systems do for you in practice, and walks through the buying decisions that actually matter — not the marketing checklist. Affiliate disclosure: this article contains affiliate links, and purchases made through them may earn a small commission at no extra cost to you.
What Is a PID Espresso Machine for Beginners?
A PID espresso machine for beginners is a semi-automatic or bean-to-cup machine that replaces a basic on/off thermostat with a proportional-integral-derivative controller — a feedback loop that continuously measures water temperature and makes tiny corrections instead of big, disruptive swings. The result is shot-to-shot consistency that’s normally hard to achieve without years of manual “temperature surfing.”
The concept itself isn’t unique to coffee. A PID controller is a feedback-based control mechanism used across countless industrial and consumer systems — the same category of technology that keeps a car’s cruise control smooth over hills. Espresso machine manufacturers borrowed this exact logic and shrank it down to fit inside a countertop appliance, which is honestly one of the more elegant bits of kitchen-gadget engineering out there.
Quick Comparison Table
| Machine | Price Range | Grinder Included | Best For |
|---|---|---|---|
| Casabrews 5418 Pro | Around $180-$300 | No | Absolute cheapest true PID entry point |
| Breville Bambino Plus | Around $400-$500 | No | Small kitchens, fast daily routine |
| Gaggia Classic Up | Around $400-$450 | No | Beginners who want to learn real technique |
| Ninja Luxe Café Premier | Around $500-$600 | Yes | Guided beginners who want hand-holding |
| De’Longhi La Specialista Opera | Around $700-$800 | Yes | Upgrading from guesswork to precision |
| Breville Barista Express Impress | Around $800-$900 | Yes | One-machine bean-to-cup workflow |
| Ascaso Dream PID | Around $1,600-$1,700 | No | Enthusiast beginners who want prosumer build quality |
Looking at the spread above, the pattern is pretty clear: the cheaper the Casabrews 5418 Pro and Breville Bambino Plus get, the more you’re expected to bring your own grinder and some patience, while machines like the Ninja Luxe Café Premier and Breville Barista Express Impress try to remove decisions from your hands entirely. The Ascaso Dream PID sits in its own category — it’s less “beginner machine” and more “machine a motivated beginner grows into” over the following five years.
💬 Found a favorite already? Save this comparison and share it — it helps other first-time buyers skip the guesswork too!😊
Top 7 PID Espresso Machines for Beginners: Expert Analysis
1. Casabrews 5418 Pro — cheapest true PID controller on the market
The standout here is simple math: this is reportedly one of the least expensive machines you can buy that still includes a real digital PID controller instead of a basic thermostat. That’s a meaningful jump in a category usually gatekept by price.
Specs-wise, it runs a 20-bar pump, a digital temperature display for setting your target degree, and a steam wand for milk work, all wrapped in a compact stainless-steel body. The PID controller is the headline feature, and it’s paired with a fast-heating thermal block, so you’re not standing around for ten minutes before your first shot. Based on the spec comparison against typical sub-$300 machines, the temperature stability alone puts it ahead of thermoblock-only competitors that rely on guesswork.
Reviewers consistently note that at this price, the 5418 Pro punches well above its weight class, with one widely cited test calling it the cheapest espresso machine with a PID controller its reviewer had encountered. What most buyers overlook about this model is that a PID controller alone doesn’t guarantee café-quality results — you’ll still need a decent grinder, since this machine doesn’t include one.
Pros:
- ✅ Genuinely rare PID access at a budget price point
- ✅ Digital temperature display makes settings transparent
- ✅ Fast thermal-block heat-up, no long wait
Cons:
- ❌ No built-in grinder — budget for one separately
- ❌ Build materials feel lighter than pricier competitors
Price sits in the $180-$300 range depending on promotions, and for a genuine first espresso machine that won’t punish a shaky budget, it’s an easy value pick.
2. Breville Bambino Plus — best all-rounder for small kitchens
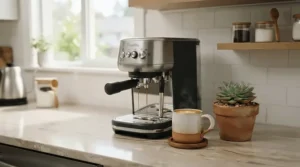
The standout feature on the Bambino Plus is its footprint: a mere 7.7 inches wide, yet it doesn’t skimp on the internals that actually matter for espresso quality.
Under the hood, the ThermoJet heating system reaches optimum extraction temperature in about 3 seconds, and the digital PID temperature control delivers water within roughly plus or minus 2 degrees Celsius of target. In practice, that near-instant heat-up means you’re not waiting around before pulling a shot, and the tight tolerance means fewer sour or bitter surprises while you’re still dialing in grind and dose. What most buyers overlook about the Bambino Plus is its automatic milk-texturing system, which uses a drip-tray sensor to gauge milk temperature and texture automatically — genuinely useful while your manual steaming skills are still developing.
Reviewers on major retail platforms consistently rate it around 4.3 out of 5 across well over a thousand reviews, with praise centering on the compact size and the automatic frothing removing a big chunk of the learning curve for milk drinks. A recurring complaint is that the 54mm portafilter and smaller basket size cap dosing flexibility compared to 58mm commercial-style machines.
Pros:
- ✅ ThermoJet heats to brew temp in about 3 seconds
- ✅ Automatic milk texturing simplifies lattes for beginners
- ✅ Compact enough for the smallest kitchen counters
Cons:
- ❌ 54mm portafilter limits third-party basket options
- ❌ No built-in grinder adds to total cost
Expect a price in the $400-$500 range depending on color and retailer. For anyone who wants real PID stability without a steep learning curve on milk, this is the value benchmark the rest of the market gets compared against.
3. Gaggia Classic Up — best for learning real technique
The standout advantage: this is the first Gaggia Classic to ship factory-built with a digital PID and a manometer, folding in the two modifications the DIY community has been bolting on for years.
Whole Latte Love’s review confirms Gaggia added PID temperature control and a manometer — a pressure gauge — to the existing Classic line, calling them the two most valuable feedback tools for learning consistent extraction. Paired with the 58mm commercial-size portafilter, this machine gives beginners the same basket format used on professional bars, which means an enormous ecosystem of upgraded baskets and accessories is available the moment you’re ready to experiment. Here’s what to weigh: this is not a hand-holding machine. For motivated beginners who want to understand what they’re doing rather than just pressing a button, the Classic Up teaches more and limits less than Bambino-style machines — it’s not forgiving, but that’s the point.
Aggregated sentiment among espresso forums and retail reviews frames the Classic Up as the honest “graduate” machine — one that won’t outgrow your skills within a year, precisely because it doesn’t limit them in the first place.
Pros:
- ✅ Factory PID plus manometer, no DIY mod required
- ✅ 58mm commercial portafilter, huge accessory ecosystem
- ✅ Brass boiler holds heat more consistently over sessions
Cons:
- ❌ Steeper learning curve than fully automatic machines
- ❌ Single boiler means alternating brew and steam functions
Pricing typically lands in the $400-$450 range. If you want a first espresso machine that rewards curiosity instead of punishing it, this is the one worth the extra patience.
4. Ninja Luxe Café Premier (ES601) — most guided beginner experience
The standout feature is Barista Assist Technology, which actively suggests grind size adjustments and automates brew parameters instead of leaving you to guess.
According to hands-on testing, the Ninja Luxe Café is a bulky but capable bean-to-cup machine that takes much of the guesswork out of perfecting espresso and coffee drinks thanks to grind size suggestions, a weight-based dosage system, and an automatic milk frother. On paper, that combination of temperature and pressure monitoring plus grinder feedback means beginners get corrective guidance in real time rather than trial-and-error over weeks. The machine also brews drip coffee and cold brew from the same unit, which is a genuine convenience if your household has mixed coffee preferences.
The spec sheet won’t tell you this, but user reports suggest the automatic milk frother performs best with dairy and 2% milk, and struggles a bit more with oat milk alternatives — worth knowing if plant-based lattes are your daily order.
Pros:
- ✅ Barista Assist Technology gives real-time grind guidance
- ✅ 3-in-1 versatility: espresso, drip coffee, and cold brew
- ✅ Built-in grinder removes a major beginner expense
Cons:
- ❌ Bulky footprint compared to single-purpose machines
- ❌ Milk frother underperforms with non-dairy alternatives
Expect pricing in the $500-$600 range at most major retailers. For beginners who want a machine that actively coaches them rather than assumes prior knowledge, this is the strongest fit on the list.
5. De’Longhi La Specialista Opera — best for precision without the guesswork
The standout advantage here is the Smart Tamping Station, which physically removes inconsistent hand-tamping from the equation entirely.
Active Temperature Control with PID maintains water temperature throughout brewing, ensuring more precision and consistency of flavour, while the integrated grinder offers 15 grind settings and three infusion temperature profiles. Based on the spec comparison, those three infusion profiles matter more than they sound — they let you match brewing temperature to bean roast level, something most beginner machines don’t even offer as an option. The tamping station applies consistent pressure automatically, so one of the trickiest manual skills in espresso-making — even, level tamping — stops being a variable you have to master before your shots taste good.
What most buyers overlook is the cool-touch steam wand, which reduces the risk of accidental burns during the early, clumsy phase of learning to steam milk — a small but genuinely thoughtful safety detail for a first machine.
Pros:
- ✅ Smart Tamping Station removes a key beginner error source
- ✅ Three PID infusion profiles match roast level to temperature
- ✅ Cool-touch steam wand reduces burn risk while learning
Cons:
- ❌ Larger footprint than single-purpose semi-automatics
- ❌ Higher price point than most “beginner” categories
Pricing generally falls between $700 and $800 depending on region and bundle. It’s a strong pick for beginners who want fewer manual variables without jumping straight to a fully automatic machine.
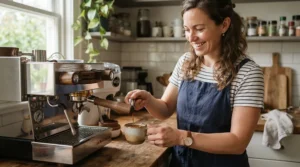
6. Breville Barista Express Impress — best complete bean-to-cup workflow
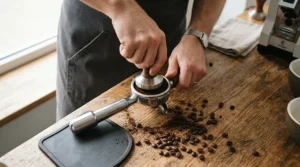
The standout feature is the Impress Puck System, which automatically doses and tamps your grounds with a consistent barista-style twist finish.
The Thermocoil heating system with PID temperature control delivers water at exactly 93 degrees Celsius for perfectly balanced flavours, alongside a precision conical burr grinder and an autocorrecting dose system that adjusts future doses to match your last outcome. What that means in practice: the machine is quietly learning your preferences and self-correcting, which takes real pressure off a first-time user who doesn’t yet know what “correct” even looks like. After years of testing similar Breville machines, reviewers note that build quality on the stainless-steel body tends to hold up well over years of daily use, provided descaling is kept on schedule.
Reviewers consistently point to the primary trade-off here: this is a genuinely complete system, from grind to tamp to extraction, but that completeness comes with a steeper interface to learn in the first week than a simple lever machine.
Pros:
- ✅ Impress Puck System automates dosing and tamping
- ✅ PID delivers water at a consistent 93°C
- ✅ Autocorrecting dose system improves consistency over time
Cons:
- ❌ Learning curve on settings during the first week
- ❌ Heavier and larger than compact alternatives
Retail pricing generally sits between $800 and $900. For beginners who want one machine to handle the entire bean-to-cup process without buying a separate grinder, this remains a benchmark pick.
7. Ascaso Dream PID — best for beginners planning to go the distance
The standout advantage is a fully programmable digital PID, letting you dial in and save your ideal brew temperature rather than accepting a fixed factory setting.
Unlike the fixed single-temperature approach on most beginner machines, the Dream PID’s programmable controller and swapped-in pressure gauge give an enthusiast-track beginner room to fine-tune extraction as their palate develops — a detail listings emphasize alongside its 15-bar pump and premium furniture-grade wood accents. Here’s what to weigh: this is priced well above typical “first machine” territory, and it doesn’t include a grinder, so total investment climbs quickly. Based on the spec comparison against E61-style prosumer machines costing two or three times as much, though, the value proposition for a beginner who already knows they’re staying in this hobby long-term is compelling.
Aggregated marketplace listings describe the finish quality and accessory bundle — steel tamper, multiple basket types, blind basket — as closer to a boutique machine than a typical beginner appliance, which tracks with its considerably higher price tag.
Pros:
- ✅ Fully programmable PID, not a fixed factory setting
- ✅ Premium build with commercial-adjacent components
- ✅ Won’t need replacing as skills advance
Cons:
- ❌ Highest price point on this list by a wide margin
- ❌ No included grinder adds significant additional cost
Pricing runs roughly $1,600-$1,700. This is squarely a “graduate” purchase — best for a beginner who’s already decided espresso is a long-term hobby, not a passing curiosity.
Practical Usage Guide: Getting Your PID Espresso Machine Set Up Right
The first 30 days with any PID espresso machine for beginners set the tone for everything after, and most of the common mistakes happen in week one, before habits form. Start with water: use filtered water from day one, since mineral buildup inside the boiler is the single biggest threat to your PID’s accuracy over time — scale insulates the temperature sensor and throws off its readings even when the display still looks correct. Run a plain water cycle through the group head before your first real shot, both to flush manufacturing residue and to let the PID stabilize at its target temperature after the machine’s initial heat-up.
For the first two weeks, resist the urge to fiddle with anything beyond grind size. A digital temperature display makes it tempting to chase the “perfect” number, but most beginners get more consistent results faster by holding temperature steady and adjusting only grind and dose until shots stop tasting sour (too cold, too coarse) or bitter (too hot, too fine). Set a recurring reminder for descaling — most manufacturers recommend every 2-3 months in average water, sooner in hard-water regions — since scale buildup is the most common cause of a PID reading correctly while the actual water temperature drifts. Finally, keep a simple shot log for your first month: grind setting, dose, shot time, and how it tasted. It sounds tedious, but it turns a random string of shots into an actual feedback loop, which is the whole point of owning a machine with real temperature control in the first place.
Real-World Scenarios: Which PID Espresso Machine Fits Your Life
Picture three different mornings. First, a grad student in a 400-square-foot studio apartment who needs one espresso and a quick oat milk latte before an 8am class — countertop space is basically nonexistent, and patience for a fussy machine is even scarcer. The Breville Bambino Plus solves this directly: its narrow footprint and 3-second heat-up mean the whole routine takes under two minutes, and the automatic milk texturing removes the one skill this student has zero time to practice.
Second, a retired teacher who’s always wanted to “really learn” espresso as a hobby, with weekend mornings to spare and a spare kitchen counter to dedicate to it. The Gaggia Classic Up rewards exactly that kind of unhurried curiosity — its 58mm portafilter and manometer give real feedback to learn from, and its lack of automation is a feature, not a limitation, for someone who wants the process as much as the coffee.
Third, a family of four juggling different coffee preferences every morning — someone wants drip coffee, someone wants a quick espresso, someone wants iced. The Ninja Luxe Café Premier was built for exactly this kind of household chaos, brewing all three formats from one machine with guided settings that don’t require every family member to become a barista.
Comparison Table: Top 7 Products at a Glance
| Machine | Boiler Type | PID Precision | Included Grinder | Best For |
|---|---|---|---|---|
| Casabrews 5418 Pro | Thermal block | Digital PID display | No | Tightest budgets |
| Breville Bambino Plus | ThermoJet | ±2°C | No | Compact daily routine |
| Gaggia Classic Up | Brass single boiler | PID + manometer | No | Learning real technique |
| Ninja Luxe Café Premier | Dual heating | Guided PID + pressure monitor | Yes | Guided beginners |
| De’Longhi La Specialista Opera | Thermoblock | 3 infusion profiles | Yes | Precision without guesswork |
| Breville Barista Express Impress | Thermocoil | Fixed 93°C target | Yes | Complete bean-to-cup workflow |
| Ascaso Dream PID | Boiler, prosumer-grade | Fully programmable | No | Long-term enthusiasts |
The clearest takeaway from this table is that PID precision scales with price, but not linearly — the jump from a fixed-target PID on the Breville Barista Express Impress to a fully programmable one on the Ascaso Dream PID costs roughly double, while the jump from no PID at all to a basic digital one on the Casabrews 5418 Pro costs almost nothing by comparison. If your budget only stretches to one upgrade, prioritizing any PID over none delivers the largest single improvement in shot consistency you can buy.
✨ Don’t Miss These Picks!
🔍 Whichever price tier fits your kitchen, tap through to check current availability and pricing before you decide — stock and colors shift fast on the popular models.
How to Choose a PID Espresso Machine for Beginners
Picking the right entry-level PID espresso machine comes down to five practical questions, answered in order of what actually affects your daily coffee the most:
- How much counter space do you actually have? Measure before you shop — a machine that looks compact online can dwarf a narrow kitchen counter in person.
- Do you want a built-in grinder, or do you already own one? A quality grinder can cost as much as the machine itself, so factor total cost, not sticker price.
- Do you want to learn manual technique, or automate it away? Machines like the Gaggia Classic Up teach; machines like the Ninja Luxe Café Premier guide.
- What’s your realistic descaling discipline? Every PID machine needs regular maintenance to stay accurate — be honest about whether that’s a chore you’ll actually do.
- Is this a hobby you’re testing, or one you’ve already committed to? If it’s the latter, a machine like the Ascaso Dream PID may cost less over five years than upgrading twice.
Common Mistakes When Buying a PID Espresso Machine
The most common mistake beginners make is assuming “PID” alone guarantees great espresso — it guarantees temperature stability, which is one variable out of several, including grind consistency, dose accuracy, and tamp pressure. A close second is underestimating total cost: choosing a machine without a built-in grinder and then being surprised that a capable burr grinder adds another $150-$300 to the real budget. Beginners also frequently ignore water quality, running hard tap water through a machine for months before scale buildup causes a service call that a $15 filter could have prevented entirely. Finally, many first-time buyers chase 58mm “commercial” portafilters purely for prestige, without accounting for the steeper learning curve that size demands compared to more forgiving compact baskets.
PID vs Non-PID Espresso Machines: What’s the Real Difference
The gap between PID and non-PID machines is almost entirely about consistency, not peak potential. Machines without PID control rely on simple thermostats that create temperature swings of 5-10 degrees, making consistent results nearly impossible for beginners who haven’t developed palate sensitivity to compensate for these variations. A skilled barista can sometimes coax a great shot out of a non-PID machine through “temperature surfing” — running water through the group head at just the right moment to catch the sweet spot before pulling a shot — but that’s a technique built on years of feel, not something a first-time buyer should rely on. A PID espresso machine for beginners essentially automates that skill, holding the sweet spot steady so you don’t need years of practice to find it. The trade-off is usually price and, on entry-level PID units, sometimes a smaller water reservoir or portafilter than a comparable non-PID competitor at the same cost.
What to Expect: Real-World Performance
On paper, PID stability sounds abstract; in the cup, it shows up as fewer wasted shots. Machines with PID or NTC control remove guesswork and produce more consistent shots than thermoblock-only designs, which in practical terms means your third shot of the week should taste roughly like your first, instead of swinging between sour and burnt as the boiler cycles. Independent research on brewing temperature backs this up at a more fundamental level — coffee-science studies on espresso extraction have found that brew temperature directly and measurably shapes the sensory profile of the final cup, reinforcing why manufacturers treat temperature stability as a core selling point rather than a gimmick, as detailed in a peer-reviewed study on brewing temperature’s influence on espresso taste. Expect a real adjustment period regardless of which machine you choose — even with perfect temperature control, dialing in grind size for a specific bean still takes several days of intentional practice.
Long-Term Cost & Maintenance
The sticker price of any PID espresso machine for beginners is only part of the real cost. Budget for a quality grinder if one isn’t included (often $100-$300), descaling solution every few months, replacement water filters, and occasional portafilter basket upgrades as your palate develops. Machines with 58mm portafilters, like the Gaggia Classic Up, tend to have cheaper long-term accessory costs thanks to a huge secondary market, while proprietary basket sizes on some compact machines can mean paying brand premiums for replacement parts. Over a five-year ownership window, a well-maintained mid-range PID machine typically costs less in total than replacing a cheaper non-PID machine twice due to component wear from unregulated heat cycling.
Features That Actually Matter (And Those That Don’t)
Digital temperature display, consistent PID accuracy, and a quality steam wand are worth paying for — they directly affect the coffee in your cup every single day. Touchscreens, app connectivity, and elaborate preset drink menus, on the other hand, are nice-to-haves that rarely change how good your espresso actually tastes; they mostly change how the machine feels to interact with. Marketing terms like “20-bar pressure” also deserve skepticism — anything 15 bars or higher is sufficient pump pressure, and the real metric worth caring about is whether the machine can maintain 9-10 bars during actual extraction, not the peak number printed on the box.
PID Espresso Machines for Small Kitchens and Tight Budgets
Beginners short on both space and cash aren’t stuck choosing between the two. The Breville Bambino Plus covers the space problem at 7.7 inches wide, while the Casabrews 5418 Pro covers the budget problem by putting a real PID controller within reach of nearly any coffee budget. Neither machine includes a grinder, so pairing either with an affordable entry-level burr grinder — rather than pre-ground coffee, which stales too quickly for good espresso — will matter more to your final cup quality than which of the two machines you pick.
Safety & Water Quality: What Beginners Should Know
Water hardness directly affects both your machine’s lifespan and your PID’s long-term accuracy, since mineral scale that builds up around the boiler and temperature sensor can throw off readings even while the digital display looks unchanged. More than 85% of American homes have hard water to some degree, according to geological survey data, which means most first-time buyers should assume they’ll need to descale more often than the minimum recommendation, not less. For anyone curious about their local water’s specific mineral profile before deciding on a filtration approach, the USGS Water Science School publishes reference data on regional water properties, including hardness. A simple in-line filter or filtered water pitcher is a low-cost way to protect your investment regardless of which machine you choose.
Frequently Asked Questions
❓ What does PID mean on an espresso machine?
❓ Is a PID espresso machine worth it for a first espresso machine?
❓ Can I add a PID to a non-PID espresso machine?
❓ Do all PID espresso machines include a grinder?
❓ How often should I descale a beginner PID temperature control machine?
Conclusion
A PID espresso machine for beginners isn’t about buying the fanciest machine on the shelf — it’s about removing one specific, invisible variable (temperature swing) so the rest of your learning curve actually has a chance to progress. Whether that means starting with the budget-friendly Casabrews 5418 Pro, growing into the technique-focused Gaggia Classic Up, or going all-in on the guided convenience of the Ninja Luxe Café Premier, the honest truth is that any machine on this list will out-perform a non-PID competitor at the same price point, purely on consistency. Your first espresso machine doesn’t need to be your last one — it just needs to teach you enough to know what you actually want next.
Recommended for You
- PID-Controlled Espresso Machine: 7 Real Picks Tested & Ranked For 2026
- Heat Exchange Espresso Machine: 7 Powerful Picks For 2026
- Heat Exchange Espresso Machine For Lever Operation: 7 Picks (2026)
Disclaimer: This article contains affiliate links. As an Amazon Associate, I earn from qualifying purchases. If you purchase products through these links, we may earn a small commission at no additional cost to you.
✨ Found this helpful? Share it with a friend who’s still drinking instant! 💬☕
